Wednesday, December 8, 2010
Green Christmas!
After a week of letting our christmas tree set in the corner of my office/sitting room, Ed and I finally decorated our tree!!! This year we took advantage of the Home Depot christmas light trade in. Using the rebate from turning in our energy sucking incandescent christmas lights (to be recycled of course), we got new energy-efficient LED christmas lights for only $3 a box! I find it super cool that I can feel less guilty about the energy used to bolster my christmas spirit, since LEDs use 80% less energy than traditional lights. Also, the initial cost was so low that we should recoup it in no time. Just a word of warning, I'm not certain if it just the brand that we purchased, but the LED lights we got project target shapes on nearby surfaces (like the ceiling and floor).
I am the type of person who always forgets to turn the christmas lights off when I go to bed, plus I hate having to crawl under the tree to plug the lights in. So, this year I hooked the christmas tree lights into a timer, and set it so they come on and off when its dark outside and we are awake (both in the morning and night). I LOVE coming home and seeing our christmas tree lit up in the window.
Saturday, June 26, 2010
Compost bin
We used this design. It took a bit to get it together:
Ed had cut and put together the frame during the week:
 |
| From Compost Bin |
We spent this morning putting the wire in the frames:
 |
| From Compost Bin |
 |
| From Compost Bin |
And then putting the sides together:
 |
| From Compost Bin |
And then, it was done!
 |
| From Compost Bin |
Monday, May 31, 2010
Memorial Outdoor Makeover Day 2: Shed
It's almost done! It only took all day today to prime and paint, but it is looking great! Ed just has to fix the hole in the roof and it will be like a new shed!
In 1.5 days we went from:
to this:
Although we are exhausted, I feel super accomplished!
For more pictures visit our album: Shed Makeover
In 1.5 days we went from:
 |
| From shed makeover |
to this:
 |
| From shed makeover |
Although we are exhausted, I feel super accomplished!
For more pictures visit our album: Shed Makeover
Sunday, May 30, 2010
Memorial Outdoor Makeover Day 1:Shed
In preparation for applying for a home equity line of credit to get a head start on some of our bigger projects, Ed and I are spending our memorial day working doing some outside makeover. While Ed put up the missing pieces of siding and mowed the lawn, I started tackling the biggest task: The shed. When we bought the shed it looked totally delapidated and about to fall down, complete with a hole in the roof. The hole we believe was from a large branch from our willow tree that came down during the big ice storm a few years ago.
Our shed before:
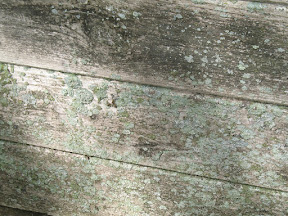
It's hard to tell from that photo, but the east side of the shed was coated in lichens:
So, saturday I spent the afternoon preparing the shed for the makeover by spraying the entire shed with a 10% bleach solution (using a garden sprayer), and weed whacking around it. Additionally, I started the process of reclaiming our shed from the wildlife: I chased out a garter snake and knocked down close to 20 wasp/hornet nests (after spraying them with wasp/hornet spray).
Today was paint prep day. We borrowed Ed's dad's pressure washer and I went at the shed. It took several hours, but under all the lichen and the grime was some good wood!
What seems to be a reoccurring theme in the beginnings of this renovation is: It's amazing what a difference just cleaning something will do! Something that we once thought wasn't going to be salvagable, just turned out to be a diamond in the rough. Hopefully the paint job tomorrow will bring out a little more sparkle.
Before:
During powerwashing:
After powerwashing:
For more photos of the shed makeover, please visit my picasaweb album: Shed Makover
P.S. After finishing the shed I used the powerwasher on the cement stairs and the asphalt walkway in the front of the house which were covered in grime and lichen. Once you get into it, powerwashing is FUN!
Our shed before:
 |
| From shed makeover |
It's hard to tell from that photo, but the east side of the shed was coated in lichens:
 |
| From shed makeover |
So, saturday I spent the afternoon preparing the shed for the makeover by spraying the entire shed with a 10% bleach solution (using a garden sprayer), and weed whacking around it. Additionally, I started the process of reclaiming our shed from the wildlife: I chased out a garter snake and knocked down close to 20 wasp/hornet nests (after spraying them with wasp/hornet spray).
 |
| From shed makeover |
Today was paint prep day. We borrowed Ed's dad's pressure washer and I went at the shed. It took several hours, but under all the lichen and the grime was some good wood!
 |
| From shed makeover |
What seems to be a reoccurring theme in the beginnings of this renovation is: It's amazing what a difference just cleaning something will do! Something that we once thought wasn't going to be salvagable, just turned out to be a diamond in the rough. Hopefully the paint job tomorrow will bring out a little more sparkle.
Before:
 |
| From shed makeover |
During powerwashing:
 |
| From shed makeover |
After powerwashing:
 |
| From shed makeover |
For more photos of the shed makeover, please visit my picasaweb album: Shed Makover
P.S. After finishing the shed I used the powerwasher on the cement stairs and the asphalt walkway in the front of the house which were covered in grime and lichen. Once you get into it, powerwashing is FUN!
Friday, May 14, 2010
Let me introduce you to our home
From Hubbardston House-Before
This is our lovely house in "downtown Hubbardston." It looks great from the
street doesn't it?
Why don't you step inside...
 |
| From Hubbardston House-Before |
 |
| From Hubbardston House-Before |
 |
| From Hubbardston House-Before |
 |
| From Hubbardston House-Before |
What would possess someone to purchase a house that looked like that? Partially, I feel
sorry for old houses that were so obviously grand once-upon-a-time and have fallen into
disrepair. I just wish I could reach out and restore them all... alas (and I'm certain my
husband says thankfully)... we could only rescue this house. Also, my parents have
either built or renovated every house that I've lived in, and through them I've learned to
look at houses and see not what's there, but what it could be.
Our goal is to restore the house to it's greek revival grandeaur and update it into as green of
a house as possible.
a house as possible.
The current house stats:
Built: 1880
Architecture Style: Greek Revival
Electrical: knob and tube; with some 220 service
Heating: Steam
Square Footage: 1,728
Beds: 3
Baths: 1
Lot size: 34,848 sq ft (almost 1 acre)
Purchase price: $80,000
Zestimate: $178,000
For more before pictures please visit my picasaweb album
Subscribe to:
Posts (Atom)


